연구원에 있으면서 기회가 되어 여러 로봇 팔을 조작해볼 기회가 생겨 작성하게 되었습니다.
다만 로보티스 OpenManipulator-X는 아직 ROS2에 최적화 되어있지 않은 느낌을 많이 받았습니다.
그래도 부족한 실력임에도 재밌는 실습이 되었던 것 같습니다.
그 과정에 대해 글을 작성하겠습니다.

먼저 ros2 humble에 맞게 환경을 설정해줍시다.
sudo apt install ros-humble-rqt* ros-humble-joint-state-publisher
그리고 워크스페이스를 하나 만듭니다.
mkdir omx_ws
cd omx_ws
ls
mkdir src
cd src
로보티스의 github에서 humble 버전을 받아주었습니다.
git clone -b humble-devel https://github.com/ROBOTIS-GIT/DynamixelSDK.git

git clone -b ros2 https://github.com/ROBOTIS-GIT/dynamixel-workbench.git

git clone -b humble-devel https://github.com/ROBOTIS-GIT/open_manipulator.git

git clone -b ros2 https://github.com/ROBOTIS-GIT/open_manipulator_msgs.git

git clone -b ros2 https://github.com/ROBOTIS-GIT/open_manipulator_dependencies.git

git clone -b ros2 https://github.com/ROBOTIS-GIT/robotis_manipulator.git

cd ~/omx_ws

colcon build --symlink-install
다음과 같은 사소한 오류와 함께 빌드가 완료됩니다.

그리고 당연히 bashrc 에 추가해줍시다.
echo 'source ~/omx_ws/install/setup.bash' >> ~/.bashrc

source ~/.bashrc
다음 명령을 수행하면 로봇 서보모터에 토크가 가해집니다.
그 전에 초기 자세를 잡아주고 명령을 실행하시기 바랍니다.
(굳이 잡아주지 않아도 init position으로 보낼 수 있습니다.)
ros2 launch open_manipulator_x_controller open_manipulator_x_controller.launch.py
그럼 이제 새로운 터미널을 열어 키보드로 조작해봅시다.
cd ~/omx_ws

ros2 run open_manipulator_x_teleop teleop_keyboard
키보드를 통해 팔이 조작 가능해집니다.

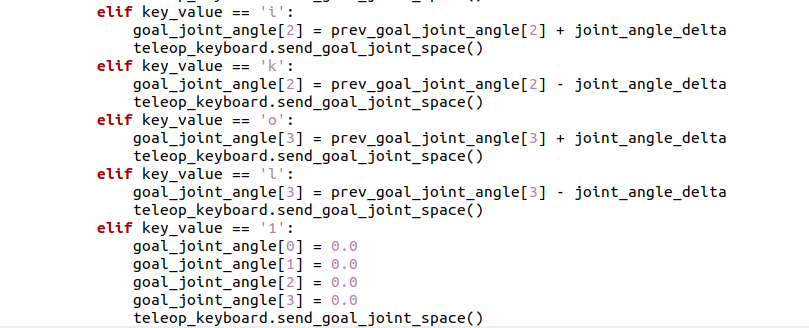
그리퍼에 대한 조작이 먹질 않아서 왜인지 코드를 확인해보았습니다.
~/omx_ws/src/open_manipulator/open_manipulator_x_teleop/open_manipulator_x_teleop/script 디렉토리에 있는
teleop_keyboard.py를 엽니다.
확인해보니 g키와 f키에 대한 조작이 없었습니다.

애초에 코드에 그리퍼 서보 모터를 받아오는 코드 자체가 존재하지 않았습니다.
ros2 foxy 용 코드를 그대로 사용해봅시다.
아래 링크에서 복사하시면 됩니다.
이제 두 터미널을 모두 종료시키고 다시 빌드를 수행합니다.
이 때 로봇에 힘이 빠지니 잡아주셔야 합니다.
cd ~/omx_ws

colcon build --symlink-install
빌드가 성공적으로 수행되면 다음 명령어를 입력합니다.
ros2 launch open_manipulator_x_controller open_manipulator_x_controller.launch.py
다른 새 터미널을 열어 다음 명령어를 입력합니다.
cd ~/omx_ws

ros2 run open_manipulator_x_teleop teleop_keyboard
Init, home 동작이 좀 더 부드러워진 것 같습니다.
이는 확인해보니 pathtime이라는 옵션이 추가되어 있었습니다.
또한, index를 4까지 받아와서 그리퍼 모터도 제어가 가능해졌습니다.
이제 두 터미널을 모두 종료시키고 첫번째 터미널에 다음 명령을 입력합니다.
ros2 launch open_manipulator_x_controller open_manipulator_x_controller.launch.py
그리고 두번째 터미널에 다음 명령을 입력합니다.
ros2 launch open_manipulator_x_description open_manipulator_x_rviz.launch.py
그럼 다음과 같은 창이 나타납니다.

로봇의 현재 모습을 보여줍니다.
Path Planning 등을 수행해보려고 했는데, 아직 moveit2를 지원하지 않는다고 합니다.
간단한 환경 구성과 키보드를 통한 조작을 해보았으니,
다음 글에서는 동작을 정의하고 수행시키는 방식에 대해 작성하겠습니다.
'Setup & Example > ROS2 + 예제' 카테고리의 다른 글
| ROS2 humble에서 UR3e 작동 및 MoveIt2 Path Planning (1) | 2024.01.18 |
|---|---|
| ROS2 humble에서 OpenManipulator-X Pick and Place + yolov8 으로 시작 명령 주기 (1) | 2024.01.05 |
| ROS2 humble - Gazebo에서 yolov8로 실시간 영상 분석 하기 (5) | 2023.12.29 |
| ROS2 humble 에서 MoveIt2 Pick and Place Example 연습 (4) | 2023.12.29 |
| ROS2 humble에서 MoveIt2 설치와 기본 튜토리얼 (1) | 2023.12.27 |